Rapid Viewer
Thank you for your interest in the Rapid Viewer.
You can use the Rapid Viewer to get racing performance insights from videos, and see how to go faster. Some of the basic features include easily slowing down and speeding up videos, zoom, panning, and quickly moving videos backwards or forwards by single or multiple frames. Advanced features include combining two videos side by side and slowing down the faster video to match the position of the slower video on track. You can export new videos and images to share, and view racing lines and lap times from overhead drone video.
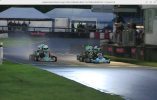
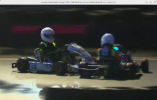
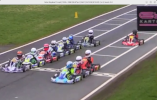
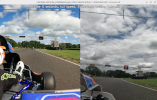

Lights out, let's go-go, go, go...!
Installing
The Rapid Viewer is currently a beta release. Functionality may change and some processes may be improved. At the moment a few steps are required to install the Rapid Viewer, which vary according to your computer's operating system. In time the installation process will be streamlined with single-click installers.
Windows
- Download the RapidViewer-win.zip file from https://rapiddata.co.uk/files/RapidViewer-win.zip
- Open the .zip file, usually by double clicking
- Copy or extract the RapidViewer folder out of the .zip to a location on your computer, typically into your Desktop or Downloads folder. You can copy and paste or drag and drop
- Look inside the RapidViewer folder. You will see the RapidViewer.exe program file, readme.txt file with some more details, and jre folder. They should be kept together in the same folder
- To create a desktop icon you can right click the RapidViewer.exe file, click "Show more options", then "Send to " > "Desktop (create shortcut)"
- Run the Rapid Viewer by double-clicking either the RapidViewer.exe file or the icon you just made
Mac
- Download the RapidViewer-mac.zip file from https://rapiddata.co.uk/files/RapidViewer-mac.zip
- Open the .zip file, usually by double clicking
- Copy or extract the RapidViewer folder out of the .zip to a location on your computer, typically into your home, Desktop, or Downloads folder
- Look inside the RapidViewer folder. You will see the RapidViewer.jar program file, RapidViewer.sh shell script file, readme.txt file with some more details, RapidViewerIcon.png file and jre folder. They should be kept together in the same folder
- We have not been able to test a Mac yet but you should be able to open the Rapid Viewer from the command line by running the shell script file with bash RapidViewer.sh
- There are further instructions in the readme.txt file about installing the Rapid Viewer as an application and adding an icon
Linux
- Download the RapidViewer-lin.zip file from https://rapiddata.co.uk/files/RapidViewer-lin.zip
- Open the .zip file, usually by double clicking
- Copy or extract the RapidViewer folder out of the .zip to a location on your computer, typically into your home, Desktop, or Downloads folder
- Look inside the RapidViewer folder. You will see the RapidViewer.jar program file, RapidViewer.sh shell script file, readme.txt file with some more details, RapidViewerIcon.png file and jre folder. They should be kept together in the same folder
- You can open the Rapid Viewer from the command line by running the shell script file with sh RapidViewer.sh
- There are further instructions in the readme.txt file about installing the Rapid Viewer as an application and adding an icon
Basic features
Menu bar and keyboard shortcuts

Most features are available from the menu bar. This shows for 3 seconds when a video or image is loaded. If you can't see the menu bar, move your mouse cursor to the top of the window and it will appear. Moving your mouse cursor over each icon on the menu bar will show you a short discription of what it does, followed by the keyboard shortcut for it, which is usually a single key but sometimes can be enhanced by holding down the shift or alt key as the shortcut key is pressed. As you become familiar with the Rapid Viewer you will probably find it faster to use just the keyboard shortcuts. The available icons may change according to the file type you have open and what you're currently doing.
Progress bar and markers

The progress bar indicates how much of your video you have watched, and is used in some of the advanced features. Like the menu bar it shows for 3 seconds and then hides when a file is opened. If you can't see the progress bar, move your mouse cursor to the bottom of the video and it will appear.
White is used to show how much of your video you have watched. Grey is used to indicate how much of your video is left.
You will learn more about markers in advanced features, but they are shown as black vertical lines between the top and bottom of the progress bar. Hovering the mouse cursor over markers will change the mouse cursor to a finger and left-clicking the marker will jump the video (or videos) to the position shown by the marker. Right clicking, or holding down shift and left-clicking, on a marker will remove it. The number of frames (and time) between markers is shown just above the progress bar when the mouse cursor is between markers on the bar. The fewest frames or shortest time between markers in each video is indicated beneath the frames (and time) as a purple horizontal line. When two videos are shown green and yellow lines indicate faster or slower laps compared to the other video.
Video details

The details of the video are shown in the title bar of the Rapid Viewer window. It includes the name of the video file, its frame size in pixels (and recorded speed in frames per second), current frame number / time watched (time remaining), current playback speed, and current zoom.
When there are two videos open, two sets of details are shown.
Open a video or image

Prompting you to open a video is the first thing the Rapid Viewer does so you probably have one open already. If you want to open a different video or image, it's the first icon on the menu bar, or the o key.
Play a video

Clicking the play video icon will play the video at the current playback speed. The keyboard shortcut is the space bar, and you can also click anywhere on the video. The progress bar will update with the position of the video, and the video details in the window title bar will update with the current frame number and the time played (and remaining).
Pause or stop a video

If the video is playing the play icon will change to a stop icon. Click this to pause or stop the video. The keyboard shortcut to stop or start again is the space bar, and you can also click anywhere on the video.
Slow down the video playback

Slowing the video down is useful for seeing things in detail that are happening too fast to be noticed at realtime speeds.
There are 4 slower video playback speeds available. They are shown in the video details in the window title bar as x -2, x -3, x -4, and x -5, meaning times minus two to times minus five, where x -2 is twice as slow as realtime and x -5 is five times as slow. Realtime playback speed is denoted as x 1 (there is no x -1). You can move backwards from the default x 1 (skipping x -1) to x -5 by clicking the Slow down video playback icon. You can also select the various slower video playback speeds by using the 1 to 5 number keys at the top of the keyboard. The 1 key will set realtime playback, the 2 key will set x -2 playback, and so on to the 5 key which will set x -5.
Speed up the video playback
 +
+
Speeding the video up is useful for moving quickly through less relevant parts of the video. You will see its use later in advanced features when measuring laptimes.
There are 4 faster video playback speeds available. They are shown in the video details in the window title bar as x 2, x 3, x 4, and x 5, meaning times two to times five, where x 2 is twice as fast as realtime and x 5 is five times as fast.
Playing at up to fives times realtime speed requires a highly accelerated graphics card, especially with large frame sizes. If your system cannot play videos as fast as requested you will notice jumps in the video. It is advised to reduce the playback speed to something your system can cope with without skipping.
You can move forwards from the default x 1 to x 5 by clicking the Speed up video playback icon. You can also select the various faster video playback speeds by using the shift key and the 1 to 5 number keys at the top of the keyboard. The 1 key will set realtime playback, holding shift and pressing the 2 key will set x 2 playback, and so on to the 5 key will which set x 5.
Move the video backwards
 ( +
or
)
Moving the video backwards by frames (often combined with slow playback speeds, zoom, and panning) is useful for locating specific frames, and multiple reviews of fast, detailed and significant parts of the video. It is also useful for setting frame markers used in some of the advanced features you'll see later.
To move the video backwards by frames use the Previous frame icon, or "," or comma key (with < above the ","). Pressing the "," key or Previous frame icon on it's own will move back 10 frames, holding down the shift key and pressing "," or clicking the Previous frame icon will move back 100 frames, and holding down the alt key and pressing "," or clicking the Previous frame icon will move back 1 frame.
The amount of time in each frame, 10 frames, or 100 frames, differs according to the framerate the video was recorded at, but each frame is the smallest difference available.
Move the video forwards
 ( +
or
)
Moving the video forwards by frames is useful for locating specific frames, and for setting frame markers used in some of the advanced features you'll see later.
To move the video forwards by frames use the Next frame icon, or "." or period/full stop key (with > above the "."). Pressing the "." key or Next frame icon on it's own will move forward 10 frames, holding down the shift key and pressing "." or clicking the Next frame icon will move forward 100 frames, and holding down the alt key and pressing "," or clicking the Next frame icon will move forward 1 frame.
Go to a time or frame number in the video

Going to specific times or frames in the video is useful if you have noted or are sharing significant parts of the video (you'll see how markers and sessions can also be used for this later).
To go to a specific time or frame in the video click the Go to time or frame icon, or use its keyboard shortcut which is the g key. This will open the Go to dialogue where you can enter either the time or frame number you want to go to. Notice how frames are calculated when you specify a time, and time is calculated when you specify frames, according to the video framerate. Clicking the Go to button will move the video to that position and close the dialogue.
Jump distance to previous marker

The jump function is really useful for adding lap markers. It optionally adds a marker on the current frame and jumps forwards the number of frames to the previous marker.
This is explained further in advanced features but the best way to use this feature is to then stop the video on the start/finish line, enable markers on play, and watch the first lap stopping again on or near to the start/finish line using the frame movement to get it exact. Then click the jump icon or press the j key and the video will move forward the same time as first lap. Use the move frame keys or icons to get exactly back onto the start/finish line and repeat until you have markers for all laps. It's really quick!
If you have added a second video and want them both to jump, hold down the shift key as you click the Jump icon or press the j key. If adding marker is on, holding down the alt key will jump without adding markers.
Zoom in

Zooming in resizes the video or image in the window to make things appear bigger. It is useful for looking at detail in the video more closely. You are also likely to combine it with moving the video within the window or panning.
The current level of zoom is shown as the last item in the window title bar. A zoom of 1 means each pixel recorded in the video is shown in 1 pixel on your screen. Values more that 1 mean more pixels are used on your screen than in the video or are shown bigger or zoomed in. Values less than 1 mean fewer pixels are used on your screen than in the video or that it's smaller or zoomed out.
When the Rapid Viewer opens a video it will set the zoom to show the video completely, without any cropping. Most often this is slightly zoomed out.
You can zoom in, or make the video or image appear bigger, by clicking the Zoom in icon, or pressing its keyboard shortcut which is the + key. If you are using a mouse with a central scroll wheel you can also rotate the mouse wheel backwards, or move two fingers outwards on some laptop trackpads.
The Rapid Viewer does its best to zoom in to where the mouse cursor is. There are several standard zoom values but the Rapid Viewer will also provide zoom values that fill the window with the video or image horizontally and vertically.
Zoom out

Zooming out resizes the video or image in the window to make things appear smaller. It is useful for looking at videos recorded at high frame sizes in a smaller window.
You can zoom out, or make the video or image appear smaller, by either clicking the Zoom out icon, or pressing its keyboard shortcut which is the - key. If you are using a mouse with a central scroll wheel you can also rotate the mouse wheel forwards, or pinch two fingers together on some laptop trackpads.
Move or pan
 ( +
or
)
Panning moves the video or image around within the window, if possible. It is useful to move what's shown in the centre of the window, especially when zoomed in. Movies and images that fit entirely within the window, often when zoomed out, will not pan.
A mouse icon is shown for panning but it's there just to tell you how to pan, and clicking on it does not do anything.
There are two ways to pan the video or image. One way is to click and drag the mouse. Clicking and dragging to the left will pan the image to left and expose anything hidden outside the window on the right, and so on.
You can also pan with the keyboard arrow keys, in the direction of the arrow. Pressing each arrow key on its own will move the visible part of the video or image 10 pixels in that direction, holding down the shift key and pressing an arrow key will move 100 pixels, and holding down the alt key and pressing an arrow key will move 1 pixel. You can keep holding arrow keys down to move continuously in that direction, and also use two arrow keys together, such as down and right, to move diagonally.
Open the previous or next file in the same folder


This is useful to quickly open and view videos or images in the same folder without having to click the Open mouse icon and select a different file.
Click the Previous file mouse icon to replace the current video or image with any video or image file that would appear previous to the current one in the same folder, sorted alphabetically. You can also use the keyboard shortcut which is the [ key.
Click the Next file mouse icon to replace the current video or image with any video or image file that would appear after the current one in the same folder, sorted alphabetically. You can also use the keyboard shortcut which is the ] key.
Reload the current file

Reloading the current file is useful to return to the first video frame and remove any markers you haven't yet saved. To do so click the Reload file mouse icon or press the r shortcut key.
Add a second video

Adding a second video is useful for comparing two videos together, side by side or above and below each other. Especially of different competitors or of different laps. This icon only appears if a video is already open, so will not appear for images. Advanced features of second videos are covered in more detail later.
To add a second video click the Add second video or session mouse icon, or press the a shortcut key. If you want to change the second video click the Add second video or session mouse icon, or press the a shortcut key again. To change the first video click the Open mouse icon or press the o shortcut key, then add the second video back.
Once a second video is added both videos will be detailed in the window title bar and each video will have its own progress bar below it which can be used to change that video's position. The Go to time or frame dialogue will let you select which video to apply this to and frame movement will apply to whichever video the mouse cursor is over.
To move frames on the first video make sure the mouse cursor is on the first video before using the Previous, or Next, frame mouse icons or keyboard shortcuts. Likewise for the second video.
Playback speeds and stop apply to both videos. You'll notice that play applys to the video that the mouse cursor is over. To play both videos at the same time hold down shift as you click Play, on either video, or press the space bar.
Change videos to horizontal or vertical orientation


When there are two videos only the middle half of each video is shown. This feature is useful if the top or sides of your videos are more important. Also note that these mouse icons only appear if a second video has been added, and only one of these icons appears at a time, which shows what the orientation will be changed to if used.
By default two videos are shown side by side or in vertical mode, as each video has its full height, vertically. To switch to horizontal mode where the videos are shown above and below each other, with their full width, horizontally, click the Change the videos to horizontal orientation mouse icon or press the c shortcut key. The mouse icon will then change to Change the videos to vertical orientation. You can continue to change between vertical and horizontal modes with the c shortcut key.
Add or do not add markers on play


Markers are useful to record positions of interest in one or two videos, to easily return to or measure the frames and time between them. They are shown on the progress bar as a black vertical line and can be added at any position in the video when starting playback. By default this feature is turned off when a video is opened, and turned on which a second video is added. You will learn more about markers in the advanced features.
To add a marker to the current video ensure adding markers is on. If you see the Add markers on play mouse icon this means adding markers is off and to turn on it on you should either click the Add markers on play mouse icon, or press the shortcut m key. This will change the mouse icon to Do not add markers on play which you can use to turn off the adding of markers. You can continue to change between adding and not adding markers on play with the m shortcut key.
Hovering the mouse cursor over markers will change the mouse cursor to a finger and left-clicking the marker will jump the video (or videos) to the position shown by the marker. Right clicking, or holding down shift and left-clicking, on a marker will remove it. The number of frames (and time) between markers is shown just above the progress bar when the mouse cursor is between markers on the bar. The fewest frames or shortest time between markers in each video is indicated beneath the frames (and time) as a purple horizontal line.
Export

Export is useful to create shorter videos or images which you can save to external files in common formats. Often to reveal and share performance insights you have uncovered using zoom, pan, reduced playback speed, a second video, etc.
To export all or part of your image or video, starting at the current frame, first zoom and position the contents of the Rapid Viewer window then click on the Export mouse icon or press the e shortcut key. The export dialogue will appear.
Options on the export dialogue vary according to whether you have opened an image, a video, or two videos. Images can only be exported to other images, the new image will be the size and current contents of the Rapid Viewer window. With both one or two videos you can choose whether to export the window contents to an image or to a new video, and can set the duration in time or frames, and the playback speed of the new video. For two videoes with two or more markers on each there are further options about whether and how to match the speed of the two videos. This is explained further in advanced features. The selected playback speed for the export is taken from the main window but can be changed for the export. Exporting at reduced playback is often useful to see more detail when watching these new videos on other devices and video players with fewer features.
Clicking the Export button will hide the dialogue and start the export. Images are exported very quickly, videos take longer. How much of the video export has been completed is shown as a percentage and visual indicator in the top right of the Rapid Viewer window. You can continue to use the Rapid Viewer as the export continues.
The Open when finished checkbox will open a new Rapid Viewer window showing the exported file for further inspection or playback with the Rapid Viewer tools.
Exporting to new videos can take some time which depends on the frame size and framerate of the videos used in the export, and the export video length. Videos recorded with larger frames and higher framerates will take longer. Two videos will be longer again. You can read about recommended device video recording settings and benchmarking in advanced features.
To cancel an export click the progress icon and you will be asked to confirm.
Save

Save is useful for reducing work in some of the advanced features. For videos it's the marker positions that are saved, for drone footage it's the settings. In each case what's saved is called a session.
To save what you've applied to a video into a session to use later click the Save mouse icon or use the s shortcut key.
Help

The help dialogue shows the current Rapid Viewer version and directs you to this webpage.
To view the help dialogue click the Help mouse icon or press the h shortcut key.
Quit

To close the Rapid Viewer window and quit click the Quit mouse icon or press the q shortcut key.
Advanced features
Recommended video recording settings
When watching, comparing, and exporting onboard footage in the Rapid Viewer we find the framerate is more important than the frame size. Large frame sizes make for really big files and slow playing and exporting! Our recommended frame size is HD or 1920 x 1080 and recommended framerate is 60fps, with image stabilisation on. This is not a standard setting on a GoPro Hero 9. We found the simplest way to set it was to change the standard profile, which was HD or 1920 x 1080 already, to 60fps. The action profile frame size of 2.7k or 2560 x 1440 was larger than necessary, this could also be reduced to HD or 1920 x 1080 as it was already 60fps.
Adding markers to measure the fastest lap and saving sessions
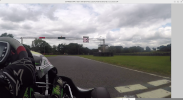
Open the video you want to find the fastest lap of in the Rapid Viewer. By default adding markers will be turned off, leave it this way for now.
Start playing the video. If you want to ignore the outlap, or any delay at the start, click the progress bar, or click the Increase playback speed icon on the menu bar, or hold down shift and press any of number keys between 2 and 5 at the top of the keyboard.
Stop the video close to the start/finish line of the first lap you want to measure. Use the Previous or Next frame mouse icons or "," and "." shortcut keys in combination with pressing alt or shift to move backwards or forwards the desired frames until the current frame shows the competitor closest to the start/finish line.
Make sure adding markers on play is enabled by checking the menu bar. If you see the Add markers on play mouse icon either click it or press the m shortcut key so the Don't add markers on play icon is shown, meaning adding markers on play is enabled.
Start playing the video. You should see the first marker appear on the progress bar.
If you didn't increase the video playback speed before, you should now to quickly complete the lap. As before, stop the video as close to the start/finish line and use the Previous or Next frame functionality to find the frame with the competitor closest to the line.
Now press the j key or Jump icon. This will add a marker to the current frame and jump the video forwards the same number of frames as the previous (or first) lap. It is unlikely to get you exactly to the start/finish line on the next lap but it will be close. Use the Previous or Next frame functionality to get back onto the start/finish line.
Repeat using the jump and frame moving functionality until you have markers for all laps.
Move the mouse cursor between markers on the progress bar to see the duration in frames (and time) of each lap. The fastest lap will show a purple horizontal line.
Save the work you have done in a session file for further use by clicking the Save mouse icon on the menu bar or pressing the s keyboard shortcut key.
Viewing two videos in the same place on the track - easiest way
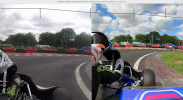
Very useful performance insights come from comparing the position on track of a slower competitor to the same position on track of a faster competitor or lap. To achieve this the Rapid Viewer export functionality can slow down the faster video to match the speed and track position of the slower video so they appear in the same place on track together in a new, combined, video. This can be done in less than 5 minutes so is perfect for providing tips to go faster, between practice sessions.
It works best to compare complete laps, either of different competitors, or different laps of the same competitor. For this example we will assume we have two different videos of two different competitor's laps, but it works much the same way with the same video used twice for different laps of the same competitor.
At least two markers in each video are required for the matching and you can achieve this without using saved sessions, but we recommend making them as per the example above, as you can re-use the saved sessions multiple times to compare videos from any number of other sessions.
We find it more intuitive to have the slower competitor on the left or above in the combined export video so we recommend starting with the faster competitor's video first. Follow the example above to open the faster competitor's video and find their fastest lap and save the session to a file.
You can add more markers at known points on the track, within the fastest lap, to match the on track positions to more accurately. Click the lap start marker on the progress bar to jump to this position and play the video, stopping and playing again at easy to identify points on the track (often lines across the track, or cracks). Make sure adding markes on play is turned on and that more markers have been added to the progress bar. We recommend a marker about every 10 seconds.
Save the faster competitor's fastest lap markers to a session file, and open the slower competitor's video.
Identify the slower competitor's fastest lap, and add markers in exactly the same places as you did for the faster competitor. At this point save the markers to a session file to reuse it, if you wish.
Now click the Add second video or session mouse icon on the menu bar, or press the a shortcut key. Locate and open the faster competitor's session file to add it. You will then see both videos side by side with their lap markers in their progress bars. You can click the markers in either video's progress bar to move both competitor's videos to the corresponding marker position. Check that they all match up.
We're about to begin the export so if you which to change between horizontal and vertical layouts of the two videos do that now by clicking the Change video to horizontal or vertical mouse icon on the menu bar or pressing the c shortcut key.
Click both videos lap start markers, and then either click the Export mouse icon on the menu bar or press the e shortcut key to open the Export dialogue. If you have at least two markers on or after the current position of the video the export dialogue will show a drop down titled Marker wait type. Select Wait between markers.
Set the duration of the lap you want exported to the new combined video in either minutes and seconds, or frames. You may also want to change the speed of the exported video, with slower speeds, such as x -3 useful for videos shared with competitors to view on devices or other video viewers with less functionality.
Click the Export button and watch the progress in the top right of the Rapid Viewer window.
If the Open when finished checkbox was ticked (the default), when the export is complete the new combined video will open in a new Rapid Viewer window.
The exported video also shows useful information about the export at the start, a time gain/loss chart, and information at the top of each competitor's video. At each marker a negative number appears at the top of the faster drivers video showing how much faster they were to that marker from the previous marker (and their total faster time from the video start). If these numbers change sides it means different drivers were faster between those markers.
If you look quickly you may also see a + occasionally at the top of the faster drivers video. These are frames on which the faster driver has been slowed down to match the slower driver and they appear proportionally between markers, as required.
Viewing two videos in the same place on the track - fastest way

This method uses further advanced features to add markers to both videos in the same window, and is really quick!
Start by opening the slower competitor's video with the Open icon or o shortcut key.
Add the faster competitor's video with the Add icon or a shortcut key.
Get both videos onto the start/finish line by moving the mouse over each video and using the progress bar and move frame icons or keys.
Make sure adding markers is on.
Hold down the shift key and click Play or either video or press the space bar. This will add markers to both videos and play them. Speed up the playback of the first lap with shift and the number keys.
Stop the videos with the Stop icon, click, or space bar, as close as you can to both start/finish lines.
Hold down the shift key and click the Jump icon or press the j shortcut key. This will create markers and jump both videos the same time as the previous (first) lap.
Move the mouse over each video and use the move frame keys to get that video onto the start/finish line.
Repeat holding down the shift key and clicking the Jump icon or pressing the j shortcut key and moving each video back to the start/finish line until you have all laps.
Move the mouse over each lap on both progress bars to find the each competitor's fastest lap, which is highlighted in purple, and click on the marker for the start of the lap.
Hold down the shift key and play both videos. Stop near and move each video to the same point on the track you want to compare with the other video.
Repeat playing both videos, adding markers to both, and matching both on track until you have markers matching all the points you want to compare.
Click on each video's start lap marker then click the Export icon or press the e key.
Check the duration and waiting type, then click the export button.
Racing lines and lap times from drone footage
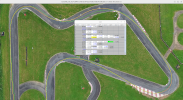
The Rapid Viewer also shows racing lines and lap times from drone footage. Please contact us to record and process drone videos into session files that you can open and view.
Data privacy
In order to improve the product, the Rapid Viewer collects some usage and error data which is securely stored in the UK and never shared. It does not share or transmit any videos or images. We will also never share any videos that have been shared with us, such as via email, links, or in person, without written permission.